Sometimes after setting up a micro SD card for use in a Raspberry Pi, it can be difficult to get it back to a normal out-of-the-box state. But the SD Card Formatter Tool from the SD Association can take care of it in seconds. It doesn’t give a lot of fancy options, but when it’s done, you’ve got a plain ol’ SD card like it came from the factory.
Android SMS Forwarding in a Foreign Land
Unfortunately, the Spreadsheet Tasker Plugin used in this post is no longer maintained and no longer works. I leave this post here in case anyone comes across an alternative that they are able to share.
I really like my Project Fi (from Google) cellular service. It works in nearly every country I travel to and I don’t need to buy a new SIM card every time I go back to the homeland in the summer. But Project Fi is limited to US phone numbers. Sadly, doing anything online in the Republic of Korea requires a local mobile phone number. I tried getting a Korean Skype-In number, but alas, it is unable to receive SMS messages and begins with a 070 prefix, not the 010 (used for mobile phones) that’s required by my bank.
I finally resolved to purchase a local prepaid SIM card to pop into an old cell phone just to receive SMS messages. A nice young gal at the SK Telecom shop in Gangnam graciously accepted my lacking proficiency in Korean and set me up with a SIM card. For just ₩50,000 I will be able to receive SMS messages for the next 12 months. However, I don’t want to tote around another phone, obliged to keep it charged for those infrequent occasions it will be needed. So, I resolved to leave the phone on and permanently plugged in at home, only to forward received sms messages to another device.
After some hours of work, I finally settled on using a Tasker event to post incoming SMS messages to a Google Spreadsheet with the Spreadsheet Tasker Plugin and have the updated spreadsheet trigger an email to myaddress@kis.or.kr – just in case something came through that I wasn’t expecting.
How to do it.
- First, install Tasker and the Spreadsheet Tasker Plugin and create a blank spreadsheet called “SMS Messages” in your Google Drive.
- On your Android phone receiving SMS messages, open Tasker and click the + icon in the bottom-right to create a new profile.
- Select Event > Phone > Received Text
- Click the Back button (←) and select New Task.
- Give it a reasonable name like “Update SMS Spreadsheet” and click the check (✓) icon in the bottom-right.
- Click the plus (+) sign to add an action.
- Select Plugin > Spreadsheet Tasker Plugin > Spreadsheet Update
- Click the Configuration (pencil) icon in the upper-right corner.
- Click Spreadsheet and navigate to the SMS Messages sheet you created in step 1 and click “Select”.
- Click the “Cells” line and enter the following:
%SMSRF;%SMSRN;%SMSRB;%MMSRD;%SMSRT
This adds the sender’s number, name, message text, MMS content (if any) and the time it was received in an hours.minutes format such that 20.35 means 8:35Pm. - Here you can scroll down and click “Save” and then “Test”. You can check your spreadsheet and should see a new line appended to it. At the moment, it prolly has the variables that you entered above. But if you send yourself an SMS, you should start seeing the message data appear in the sheet within 10-20 seconds. At this point, if you know you’re going to receive an SMS, you can just open that spreadsheet and see it as it’s received. If it doesn’t, double check the steps above and let me know if you need help.
- If you want to receive an email notification whenever the sheet receives an SMS message, just set up the notification rules in the spreadsheet (Tools > Notification rules > Add notification rule > Any changes are made and > Email – right away) .
- BONUS: I also just set it up to notify me if I miss a call to that number. I created another spreadsheet (though I prolly coulda used the same) and selected Missed Call instead of Received Text and modified the variables to:
%CNAME;%CNUM;%CDATW;%CTIME
Assign Students to Teams in PowerSchool
- From the main PowerSchool page, select desired students
- In the left menu, click “PowerScheduler”
- Near the bottom of the left menu, select “Functions”
- Near the bottom of the list, select “Update selection”
- Verify that the Current Table is the Students table and the “Current Records in Selection” matches the desired number of students
- Do not change anything else on this page
- To the right of “Current Records…”, select “Modify Records”
- Verify that the “Current Table” is Students and the number of students in your selection is correct
- In the dropdown, select “Sched_NextYearTeam”
- Verify that you’ve selected “Sched_NextYearTeam” and not something similar. You will be making changes directly to the database
- Enter the Team Number (like 2933) not the Team Name in the entry box
- NOTE: you can see the team numbers corresponding to team names by clicking on Teams under Scheduling Setup in the left menu
- Verify that you’ve entered the correct team number, selected Sched_NextYearTeam and your selected records number looks correct
- Repeat step #12
- Click the blue “Modify Selected Records”
Install iMovie 9 or iTunes 12.6.2 on El Capitan – OS X 10.11
We had a student needing to get iMovie on her Mid 2012 MacBook Pro running El Capitain 10.11.6. Apple makes it hard to get older apps running on old OSes, but we have a workaround.
NOTE: this method also works for older versions of iTunes like 12.6.2 (the last version to allow purchasing iPad apps) and other older Mac versions. Just change “iMovie” to “iTunes” or whatever the app name is.
Here’s what to do:
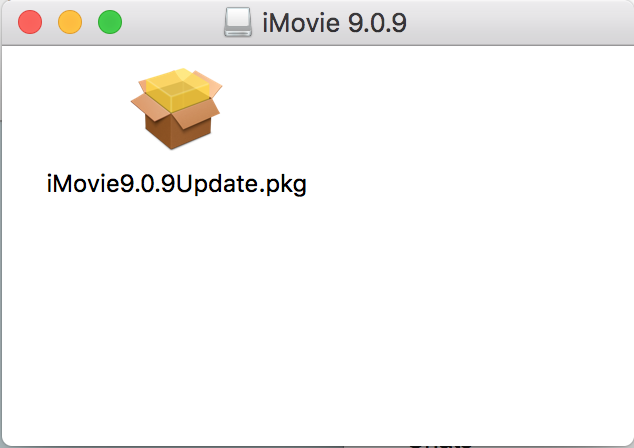
Download the legit iMovie 9.0.9 from Apple’s site here and double click the downloaded imovie9.0.9update.dmg file. This will open a folder looking like the pic below. DO NOT OPEN the .pkg file. Just move that window to the side of your screen (but keep it open).
Open your Terminal app (Applications > Utilities > Terminal.app) and type in “pkgutil –expand ” (NOTE: there is a space between pkgutil and — which are two hyphens and a space after the word expand). Then drag the iMovie9.0.9Update.pkg file and the iMovie folder into the terminal app like this:
Now, add a space after iMovie9.0.9Update.pkg and carefully add the following into Terminal replacing “username” with your username (usually shown just before the $ in Terminal):
/Users/username/Desktop/newfolder/
It should look like this when you’re done:
Now press “Enter” and if all goes well, you shouldn’t see much happen for a minute or two. When pkgutil is done running, you will see a folder named newfolder on your Desktop. Open the newfolder folder and the the iMovie folder within it and you should see this:
Right-click iMovie9.0.9Update.pkg and select “Show package contents”. You should see this:
Right-click the Payload file, select the Rename option and add the extension “.zip” and when asked if you’re sure you want to do so, click the “add” button. Once you see the Payload.zip icon, double-click it to expand the contents. In a minute or two you should see a Payload 2 folder. If you open that folder and the Applications folder within, you will see iMovie.app:
Drag the iMovie.app file to your Applications folder in Finder. Now, you can open iMovie and edit movies to your heart’s content. If it refuses to open the first time, right-click the icon, select “Open” and when told the app is from an unverified developer, click the “Open” option like the rebel you were born to be.
Using a VirtualBox Virtual Machine to Maintain iPad App Purchasing in iTunes – Post High Sierra
The recent High Sierra MacOS update brings us iTunes 12.7 which loses the ability to purchase apps for iPads associated with an Apple ID from within iTunes. There are convoluted methods of downgrading iTunes 12.7 to 12.6 to regain that capability, but it’s a pain to keep preventing Apple’s updates from forcing a user to lose this capability.
For most individual users, this isn’t much of an issue, but for institutional users, it makes it more complicated to acquire and distribute apps to iPads.
My solution is to build a VirtualBox machine with an original (un-updated) High Sierra MacOS with iTunes version 12.6. Whenever I need to access an Apple ID tied to a specific iPad account, I just fire up the MacOS VirtualBox, log into the associated iTunes account, acquire the needed app(s), and then log out. Since I have the iPads set up to auto-download apps purchased with the account, the apps typically show up on the device without additional intervention.
Let me know if you could benefit from a clone of my MacOS machine or need additional guidance on using VirtualBox.
The Mystery of the Unsharable Calendar
I was working with my good buddy Rotimi on a Google Calendar issue tonight. His school (like mine) uses a Google Calendar for campus events with an iframe used to display events on the school website’s calendar page.
Unfortunately, something changed so that events only showed “busy” with no descriptions or details when viewed by anyone who wasn’t logged in to a school-managed Google account. Rotimi logged into the calendar owner’s account but he was not able to change the sharing settings to show all event details to the public as that option was greyed out and unavailable:
I thought that there may have been a change in the Google Admin Control Panel for the account’s OU, but that turned out not to be the case. Rotimi went back to the user account that owned the calendar and looked more closely at the list of people in the “Share with specific people” section. Interestingly, two of those who were able to make changes and manage sharing were domain admins. When Rotimi accessed the sharing page from his Google Administrator account (rather than the calendar owner’s account) he was able to access the “See all event details” option in the calendar sharing settings. As soon as he saved this setting, all event details were once again showing on the website even if the viewer was not logged into a school Google account.
We think that one of the domain admins may have inadvertently changed the sharing settings for this calendar to hide event details from viewers who are not logged into a school account. Apparently, if a domain administrator changes the sharing settings of an individual user’s calendar, it overrides the sharing settings available to the calendar’s owner so that he/she can no longer share it more openly than what the admin user set. In other words, it looks as though if an admin changes a user’s calendar sharing setting, the user can make the sharing more restrictive, but not more open than the setting made by the admin.
Ripping DRM DVDs on MacOS with libdvdcss and Handbrake
Many educational materials producers use DVDs (12cm flat disks with a mirror-like surface on one side, a digital storage media popular in the 1990s) to distribute materials to teachers. To assist our modern staff update their media resources, we secured some drives to access content on DVDs . Unfortunately, media producers, in a misguided attempt to be pains in the neck, used a tool called DRM to increase the effort required to convert the media content to a useable format. The following is a tutorial on how we convert outdated DRM media into a useable format. The key is to install the libdvdcss library. To get there, takes a little work, but the easiest way is to install xcode tools and Homebrew (helpful for installing lots of different tools) which makes installing libdvdcss and Hombrew easy.
- Install xcode tools (this may take a while):
sudo xcode-select --install sudo xcodebuild -license accept
- Install Homebrew:
/usr/bin/ruby -e "$(curl -fsSL https://raw.githubusercontent.com/Homebrew/install/master/install)"
- Install libdvdcss:
brew install libdvdcss
- Install Handbrake:
/usr/bin/ruby -e "$(curl -fsSL https://raw.githubusercontent.com/Homebrew/install/master/install)"
- Install libdvdcss:
brew install handbrake
Now, you should be able to fire up Handbrake and rip your content to your computer. Handbrake tutorials are plentiful on the Interwebs if you need more support with ripping DVDs.
Bulk Editing Google Docs with a Script
We used Google Docs for elementary progress reports. A spreadsheet and Autocrat let me create all the files and even drop them into folders by homeroom class. But that’s not what this is about.
After teachers started entering grades, the principal noticed that the grading key was missing some information. The easy fix would have been to recreate the docs and have the teachers start over. But this would have created extra work for teachers on one of their least enjoyable tasks.
A quick Google search led to a script that would allow me to edit the documents en masse. Not surprisingly, the starter script came to me via Amit at https://labnol.org. It takes the folder path containing the docs to be edited, the “search” text and the “replace” text. Then it goes through all the docs in the folder, makes a backup and then does the search/replace in each doc.
Amit’s script is effective but limited to a basic find/replace in the body text of Google Docs in one folder. I expanded it to allow formatting text in addition to find/replace in Google Doc headers, bodies, and footers across multiple folders. You can find my script here.
Just as I expanded Amit’s script, when you’re ready to expand mine, visit the Class Text section of Google Apps Script tutorials for more options.
Downgrade iTunes from 12.7 to 12.6
UPDATE:
This proves to be a roundabout way of downgrading iTunes. Please see this post on installing an older version of iMovie which is a much faster, more reliable method. Just change “iMovie” to “iTunes” and it works the same.
We use iTunes to manage several iPads on our campus. We log in from our iMacs and purchase apps that then automatically download to our devices. Unfortunately, iTunes lost support for iOS app purchases in version 12.7 in the October of 2017. Any time we update MacOS, I’m anticipating that we’ll need to downgrade iTunes to 12.6.2 to regain this functionality.
Apple doesn’t make this easy. One needs to first delete the current iTunes app, swap out the iTunes Library.itl file and then install 12.6.2.
If your Mac doesn’t allow you to delete iTunes, you’ll need to turn off System Integrity Protection to do so:
- Restart your Mac, holding down Command-R until you see the Apple logo
- Once the computer boots, under the Utilities menu, open Terminal.
- Turn off SIP by entering the command csrutil disable.
- Enter reboot to restart your Mac
Once restarted, you should be able to remove iTunes. You should be able to do so in Finder or in Terminal with . sudo rm -rf /Applications/iTunes.app.
Now, in Finder, visit ~/Music/iTunes/ folder and locate the file named “iTunes Library.itl” and move it somewhere safe as a backup.
Then open the “Previous iTunes Libraries” folder and find the most recent dated iTunes Library file (these are labeled by the last iTunes install date). Copy this file and paste it into the iTunes/ folder and rename it “iTunes Library.itl”. I ran into issues doing it this way once and just deleted the iTunes Library file altogether. iTunes just made a new one in the next step.
Now, download iTunes 12.6.2 here and install it.
You should now be able to run iTunes 12.6.2 with access to the iOS App Store.
Finally, go back and turn SIP back on:
- Restart your Mac, holding down Command-R until you see the Apple logo
- Once the computer boots, under the Utilities menu, open Terminal.
- Turn off SIP by entering the command csrutil enable.
- Enter reboot to restart your Mac
If this fails, check out this solution from here:
1.turn off SIP as noted above
2.Mac restart
3.Enter this Terminal code (OK to copy all/paste into Terminal)
sudo rm -rf /Library/Documentation/Applications/iTunes/Acknowledgements.rtf /Library/Documentation/iPod/Acknowledgements.rtf /Library/Frameworks/iTunesLibrary.framework/ /Applications/iTunes.app/ /System/Library/PrivateFrameworks/iTunesAccess.framework/ /System/Library/LaunchDaemons/com.apple.fpsd.plist /System/Library/PrivateFrameworks/CoreFP.framework/ /System/Library/PrivateFrameworks/CoreADI.framework/ /System/Library/LaunchDaemons/com.apple.adid.plist /System/Library/CoreServices/UAUPlugins/ADIUserAccountUpdater.bundle/ /System/Library/CoreServices/CoreTypes.bundle/Contents/Library/MobileDevices.bundle/ /System/Library/LaunchDaemons/com.apple.usbmuxd.plist /System/Library/PrivateFrameworks/AirTrafficHost.framework/ /System/Library/PrivateFrameworks/DeviceLink.framework/ /System/Library/PrivateFrameworks/MobileDevice.framework/ /System/Library/Extensions/AppleMobileDevice.kext/ /System/Library/Extensions/AppleUsbEthernetHost
4.install iTunes 12.6.2 & restore Your backup file 「 iTunes Library.itl 」
5.turn on 「 MAC SIP 」
6.Disable iTunes update – terminal code:
sudo softwareupdate --ignore iTunesXPatch
Thanks to OSXDaily and Apple Discussion guy Niel for tips.
Tracking Down Student Records after Permanently Storing Grades Improperly (PowerSchool)
In June, 2017, we stored grades for our secondary students, neglecting to exclude enrollments that were not active at the time. This means that if any student dropped a course for any reason and had received a grade in the grade book, that course would show up on a transcript with the grade that was current as of the drop date. We didn’t catch the error until the following October. So, we had to track down every high school enrollment that had been unenrolled, pretty much from the first week of second semester. Then we needed to check to see if there was a permanent grade stored for that enrollment and, if so, delete it from the database.
The hardest part was figuring out how to find the students in DDE. This is how we did it:
- In the CC table, select all records.
- SchoolID = 300 (Our High School)
- DateLeft < 06/01/2017 (The end of the semester was 06/07/2017)
- DateLeft > 01/10/2017 (The end of the first week of the semester)
- Course_Number < 898 (We have dozens of “Club” courses numbered 898-995)
- This whole process needs to be repeated to also select course Numbers > 999 to catch the rest of the non-club courses.
- *** Switch to the Students table ***
- Grade Level >= 9 (Get current HS Freshmen and above)
- Grade Level <=12 (Restrict to Seniors and below – exclude Graduates)
- Enroll_Status = 0 (Current students only)
- Match selection with CC table
Once we had this info, we ran transcript reports for the 35 or so students and checked to see if grades were showing up for dropped courses. Luckily, there were only a few for underclassmen that needed correcting and none of any significant consequence.